 Save
Save I'll never forget the year my sister asked me to design the cheese board for our family's holiday gathering. She wanted something that would make people gasp when they walked into the dining room—something that felt like winter had landed right on our table. That's when the Tannenbaum Border was born. It started as a simple idea: what if the frame of the board itself told a story of evergreen forests and festive magic? Now, every December, my hands instinctively reach for thin slices of cheese and green grapes, and suddenly, a simple platter transforms into an edible forest that brings everyone together.
I remember my neighbor peering over at our board during a holiday potluck and asking if it was too pretty to eat. Within minutes, those carefully arranged cheese trees were gone, picked apart with genuine joy. That's when I realized this wasn't just about presentation—it was about creating a moment where food becomes a conversation starter and a memory maker.
Ingredients
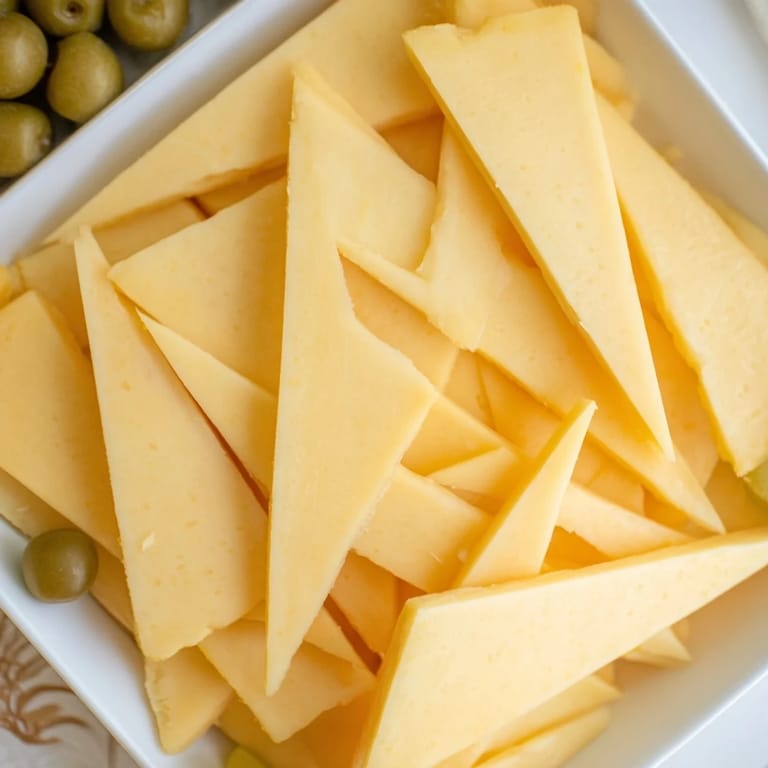
- Semi-firm cheese (250 g), such as Gouda, Edam, or Emmental: Choose a cheese that's been chilled well—coldness makes slicing cleaner and easier. The semi-firm varieties hold their triangular shape beautifully, and their mild, slightly sweet flavor complements the sweetness of grapes perfectly.
- Small green seedless grapes (150 g): Wash and dry them thoroughly before you begin. Wet grapes will slip around on the board and won't nestle into those charming gaps between the cheese trees. Look for grapes that are plump and vibrant—they should look like precious little jewels scattered through your evergreen forest.
Tired of Takeout? 🥡
Get 10 meals you can make faster than delivery arrives. Seriously.
One email. No spam. Unsubscribe anytime.
Instructions
- Chill Your Canvas:
- Start with a clean, dry cutting board and make sure your cheese has been sitting in the coldest part of your refrigerator. Cold cheese is forgiving cheese—it slices cleanly without crumbling or tearing, and it holds that elegant triangle shape you're aiming for.
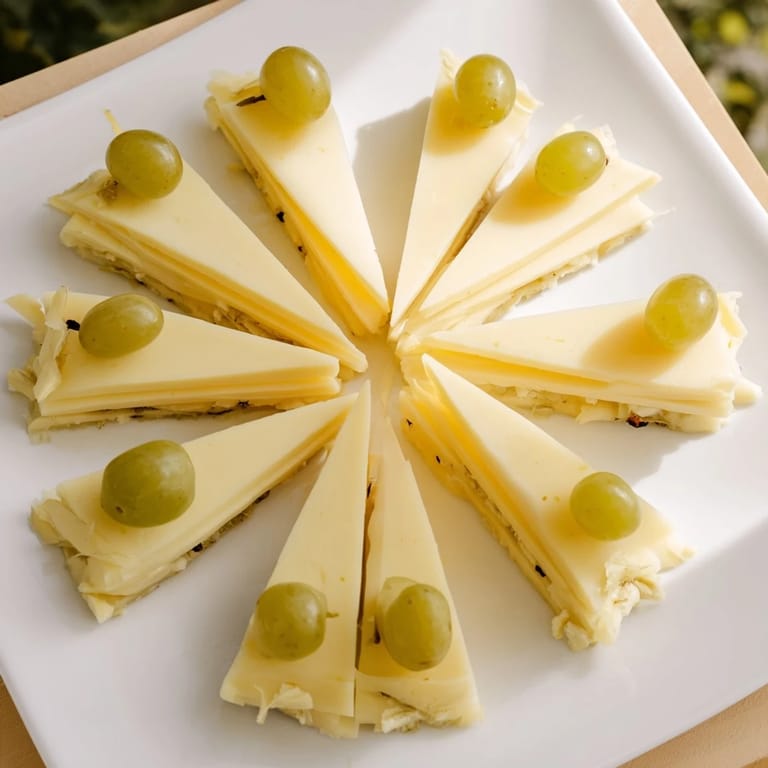
- Slice Your Trees:
- Using a sharp chef's knife, slice the cheese into thin, triangular pieces about 5 to 6 centimeters long, with a base of roughly 1 centimeter wide. Think of each slice as a stylized pine tree—the point facing up and out. This might feel fiddly at first, but you'll find a rhythm. If a slice breaks, save it; broken trees still belong in a forest.
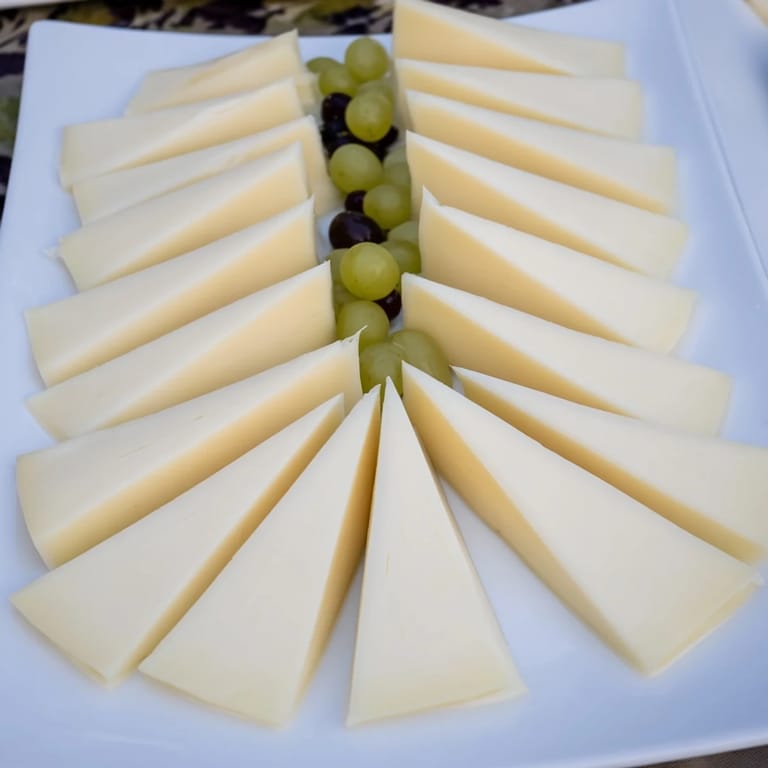
- Arrange the Border:
- Place your wooden or ceramic serving board in front of you. Starting at one corner, arrange the cheese triangles along all four edges, with the points facing outward like little trees standing guard around your platter. Leave small, deliberate gaps between each cheese piece—these gaps are where the grapes will nestle in.
- Nestle the Grapes:
- Now comes the magic. Take those dried green grapes and tuck them into the spaces between your cheese triangles, under the points, and around the edges. They should look like they're nestled under the branches of your cheese trees, creating depth and visual interest. This is where it becomes less recipe and more art.
- Complete and Fill:
- Step back and admire your festive frame. Once the entire border looks cohesive and complete, fill the center of your board with additional cheeses, cured meats, crackers, nuts, dried fruits, or whatever brings joy to your table.
 Save
Save There was a moment during last year's holiday dinner when a child noticed the cheese border and said it looked like an enchanted forest. Their parent smiled, picked up a grape, and suddenly everyone was exploring the board with genuine wonder. That's when I understood that the Tannenbaum Border isn't just about feeding people—it's about creating a shared experience and a small moment of holiday magic.
The Art of the Cheese Slice
The key to a stunning border lies in consistent, confident slicing. Your knife matters more than you'd think—a dull blade will crush the cheese and create jagged edges, while a sharp blade will glide through cleanly. Hold the knife at a slight angle as you slice, using a gentle sawing motion rather than pressing down hard. Each triangle should be relatively uniform in size, which creates visual rhythm around your board. If you're new to knife work, practice on your first couple of slices; muscle memory develops quickly, and you'll find yourself creating perfect cheese trees with almost no thought.
Variations and Holiday Spirit
This border is your canvas for creativity. While green grapes are classic and feel perfectly wintery, don't hesitate to play with color. Red grapes add a pop of festive color, pomegranate seeds catch the light like tiny rubies, and fresh rosemary sprigs tucked between the cheese slices create an authentic pine needle effect that makes the forest smell like a winter forest. Some years I add a few cranberries or a scattered gold leaf for extra glamour. The beauty of this presentation is that it's flexible enough to match your table's aesthetic while remaining unmistakably festive.
Making It Part of Your Holiday Ritual
Once you've created this border once, it becomes part of your holiday toolkit—something you reach for year after year because it's beautiful, it's simple, and it never fails to delight. Set aside fifteen minutes before your guests arrive, put on your favorite holiday music, and let your hands remember the rhythm of slicing and arranging. It becomes meditative, almost a quiet moment of preparation that centers you before the celebration begins. The Tannenbaum Border is less about the technique and more about the intention you bring to the table, the care you put into feeding people, and the small moments of wonder you create in the process.
 Save
Save The Tannenbaum Border has become more than a recipe in my kitchen—it's a quiet tradition that says, 'You're worth the fifteen minutes of care and thought.' Every time you create one, you're not just arranging cheese and grapes; you're building a moment of beauty and togetherness that your guests will remember long after the cheese is gone.
Recipe Questions & Answers
- → What type of cheese works best for the Tannenbaum border?
Semi-firm cheeses like Gouda, Edam, or Emmental chilled well hold their shape and are ideal for thin triangular slicing.
- → How can I make the border more colorful?
Alternate in red grapes or pomegranate seeds for pops of vibrant color between the green grapes and cheese slices.
- → How thick should the cheese slices be?
Slice cheese about 5–6 cm long and 1 cm wide at the base to achieve a stylized pine tree effect without crumbling.
- → Can this border be prepared ahead of time?
Yes, prepare the cheese triangles and grapes shortly before serving to maintain freshness and appearance.
- → What tools are recommended for assembling the border?
A sharp chef's knife and a wooden serving board make slicing and arranging the border easier and more precise.