 Save
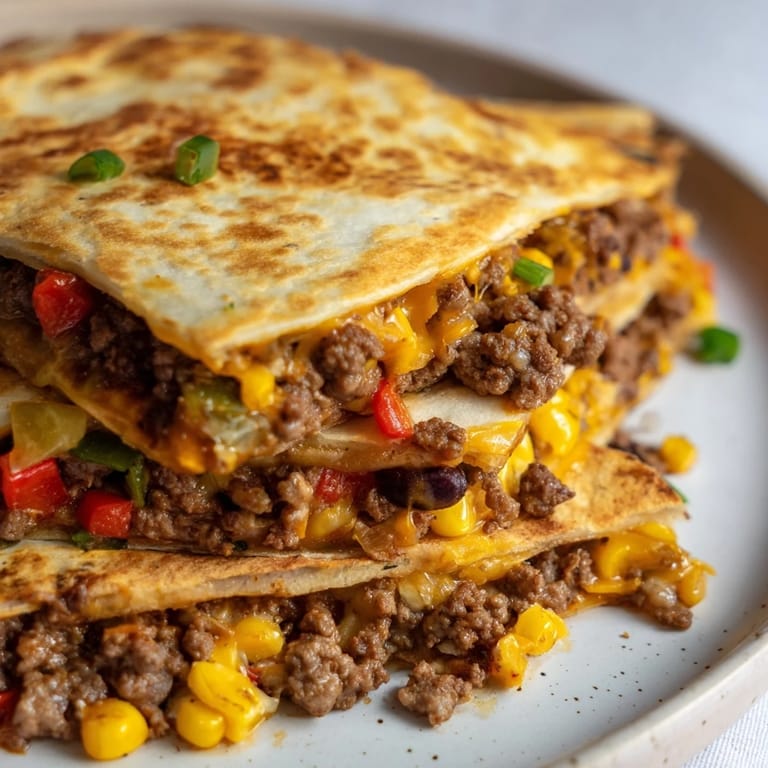
Save Crispy golden quesadillas filled with seasoned beef melted cheese and colorful vegetables—baked on a sheet pan for an easy crowd-pleasing meal.
I first tried sheet pan quesadillas on a busy weeknight and was amazed at how quickly dinner came together with minimal mess. Everyone loved grabbing slices fresh from the oven especially with all the tasty toppings.
Ingredients
- Beef Mixture: 1 lb (450 g) ground beef 1 small yellow onion finely diced 2 cloves garlic minced 1 red bell pepper diced 1 packet (1 oz/28 g) taco seasoning 1/3 cup (80 ml) water
- Cheese and Veggies: 2 cups (200 g) shredded cheddar cheese 1 cup (100 g) shredded Monterey Jack cheese 1 cup (150 g) frozen corn thawed 1 (15 oz/425 g) can black beans drained and rinsed 2 green onions sliced
- Assembly: 8 large flour tortillas (10-inch/25 cm) 2 tbsp (30 ml) olive oil Cooking spray
- Serving (Optional): Salsa Sour cream Fresh cilantro chopped Lime wedges
Tired of Takeout? 🥡
Get 10 meals you can make faster than delivery arrives. Seriously.
One email. No spam. Unsubscribe anytime.
Instructions
- Preheat Oven:
- Preheat oven to 425°F (220°C). Line a large rimmed sheet pan (approx. 18x13 in/45x33 cm) with parchment paper or lightly grease.
- Cook Beef:
- In a large skillet over medium heat cook ground beef until browned about 5 minutes. Drain excess fat if needed.
- Sauté Vegetables:
- Add onion garlic and bell pepper. Cook for 3–4 minutes until softened.
- Season & Simmer:
- Stir in taco seasoning and water. Simmer for 2–3 minutes until thickened. Remove from heat.
- Add Corn Beans & Green Onions:
- Add corn black beans and green onions to the skillet. Mix to combine.
- Arrange Tortillas:
- Lay 6 tortillas overlapping around the edges of the prepared sheet pan so half the tortilla hangs over the edge and the centers overlap covering the whole base. Place 1 tortilla in the center to cover any gaps.
- Add Filling & Cheese:
- Evenly spread the beef and vegetable mixture over the tortillas. Sprinkle cheddar and Monterey Jack cheese on top.
- Fold & Seal:
- Fold the overhanging edges of the tortillas toward the center covering the filling. Place the final tortilla in the center if needed to seal.
- Brush & Bake:
- Brush the top with olive oil or spray lightly with cooking spray.
- Weigh Down & Bake:
- Place another sheet pan on top to weigh down the quesadillas. Bake for 15 minutes. Remove the top sheet pan and bake for an additional 5 minutes until golden and crisp.
- Cool & Serve:
- Let cool for 5 minutes before slicing into squares. Serve with salsa sour cream cilantro and lime wedges as desired.
 Save
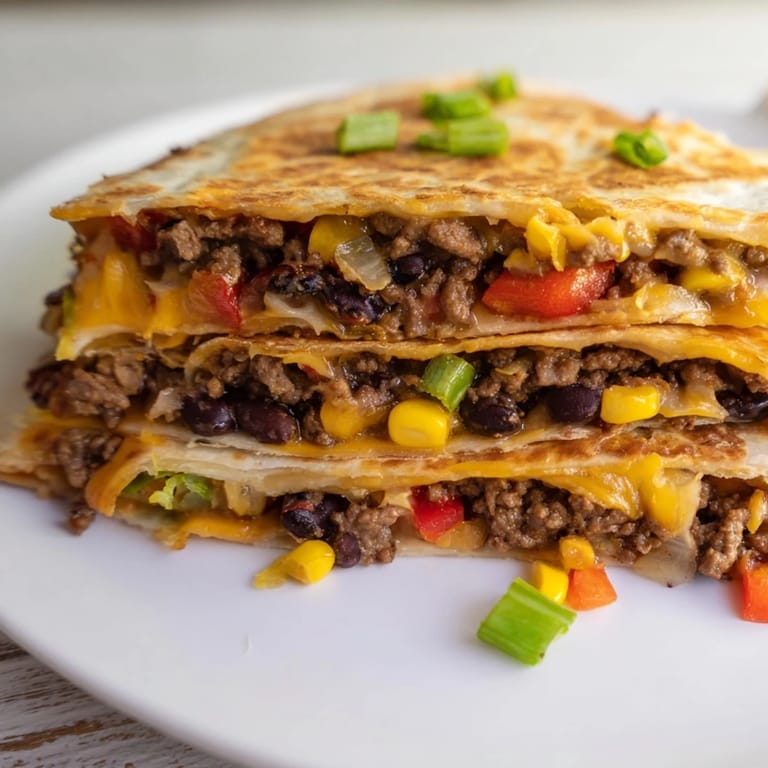
Save Sharing this meal has become a weeknight tradition in our home even picky eaters look forward to piling on their favorite toppings together.
How to Customize Your Quesadillas
Try adding extra veggies such as spinach chopped tomatoes or roasted sweet potatoes for more color and nutrition. Swap out cheeses or meats to match personal tastes.
Serving Suggestions
Serve with a side salad rice or classic refried beans for a complete meal. For dipping salsa guacamole and sour cream are always favorites.
Storage & Reheating
Leftover quesadilla squares keep well in an airtight container in the refrigerator for up to 3 days. Reheat in the oven or skillet for best results.
 Save
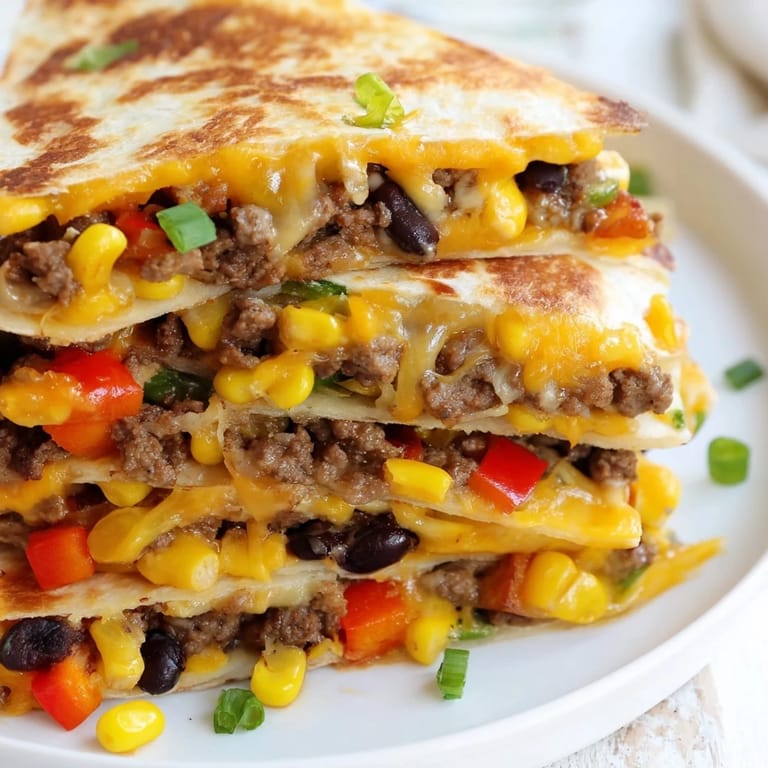
Save Enjoy these sheet pan quesadillas as a fun shareable dinner or party appetizer. The process is simple and the flavor is always a hit!
Recipe Questions & Answers
- → How do I prevent the quesadillas from becoming soggy?
Cook the beef mixture until thickened and avoid excess liquid before assembling. Using parchment paper and lightly brushing olive oil improves crispiness.
- → Can I use different cheeses in this dish?
Yes, cheeses like mozzarella, pepper jack, or a Mexican cheese blend can be used for varied flavors and melt consistency.
- → What are good substitutions for ground beef?
Ground chicken, turkey, or plant-based crumbles work well to suit preferences or dietary restrictions.
- → How do I add extra heat to the quesadillas?
Incorporate diced jalapeños or a pinch of cayenne pepper into the beef mixture for a spicier kick.
- → Can these quesadillas be made gluten-free?
Yes, using gluten-free tortillas instead of flour tortillas makes this dish suitable for gluten-sensitive diets.