 Save
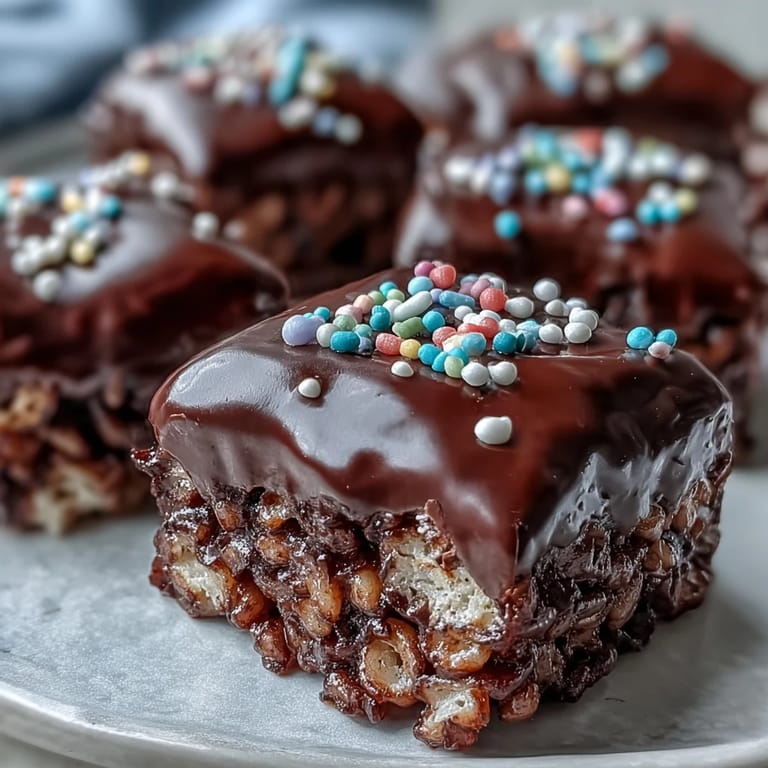
Save My nephew once called these "the fancy kind" after I brought a tray to his birthday party, and honestly, that stuck with me. There's something irresistible about taking a childhood classic and dressing it up with a glossy chocolate coat and a shower of sprinkles. The crunch of the cereal against the snap of hardened chocolate creates this playful texture that makes it impossible to eat just one. I've made plain Rice Krispy treats dozens of times, but adding that chocolate layer transformed them from snack to centerpiece. Now they're my go-to whenever I need something that looks impressive but doesn't require any real baking skills.
I remember making these for a potluck and watching people hesitate before taking one, like they were too pretty to eat. Then someone broke the silence, took a bite, and suddenly the entire tray was gone in minutes. A coworker asked if I'd used a special mold or some pastry trick, and I had to laugh—it's just cereal, marshmallows, and melted chocolate pressed into a pan. But that's the magic of it: something so simple can feel like a celebration. The compliments I got that day made me realize presentation matters, even with the humblest ingredients.
Ingredients
- Unsalted butter: This is what melts the marshmallows into that gooey base, and using unsalted lets you control the sweetness without any salty interference.
- Mini marshmallows: They melt faster and more evenly than the large ones, creating a smoother binding agent that coats every piece of cereal.
- Rice Krispies cereal: The star of the show—light, airy, and sturdy enough to hold its shape once everything sets.
- Fine sea salt: Just a pinch cuts through the sweetness and adds a subtle depth that makes people wonder what your secret is.
- Semisweet or dark chocolate chips: I prefer semisweet for balance, but dark chocolate lovers can go richer without overpowering the treat.
- Vegetable oil or coconut oil: A teaspoon thins the chocolate just enough to spread smoothly and gives it that glossy, professional finish.
- Rainbow sprinkles or chopped nuts: This is where you make it yours—colorful, crunchy, festive, or elegant depending on the occasion.
Tired of Takeout? 🥡
Get 10 meals you can make faster than delivery arrives. Seriously.
One email. No spam. Unsubscribe anytime.
Instructions
- Prep your pan:
- Grease your square pan generously with butter, or line it with parchment paper for easy lifting later. A well-greased pan means no sticking and clean edges when you cut.
- Melt the butter:
- Use low heat and stir constantly so the butter melts without browning or separating. Once it's completely liquid, you're ready for the marshmallows.
- Melt the marshmallows:
- Add them to the butter and keep stirring gently until they turn into a smooth, glossy pool. If you see any lumps, just keep stirring—they'll dissolve.
- Season the base:
- Remove from heat and stir in the sea salt if you're using it. This is also when you'd add vanilla extract if you want a hint of warmth.
- Fold in the cereal:
- Pour in the Rice Krispies and fold gently with a spatula until every piece is coated in marshmallow. Don't crush the cereal—you want to keep that signature crunch.
- Press into the pan:
- Transfer the mixture to your prepared pan and press it down evenly using a buttered spatula or lightly greased hands. Firm pressure gives you neat, compact bars.
- Let it rest:
- Allow the base to sit at room temperature for about 10 minutes so it firms up slightly before you add the chocolate. This prevents the chocolate from sinking in.
- Melt the chocolate:
- Combine chocolate chips and oil in a microwave-safe bowl, then heat in 30-second bursts, stirring after each interval. Stop as soon as it's smooth and glossy to avoid seizing.
- Pour and spread:
- Pour the melted chocolate over the cereal base and use an offset spatula or the back of a spoon to spread it evenly to the edges. Work quickly before it starts to set.
- Add your toppings:
- Immediately scatter sprinkles or chopped nuts over the wet chocolate so they stick. This is your moment to get creative.
- Set the chocolate:
- Let the treats sit at room temperature for at least an hour, or pop them in the fridge for 20 to 30 minutes if you're in a hurry. The chocolate should be firm to the touch.
- Cut into bars:
- Lift the whole block out using the parchment overhang, or invert it onto a cutting board. Use a sharp knife to cut into 12 to 16 bars, wiping the blade between cuts for clean edges.
 Save
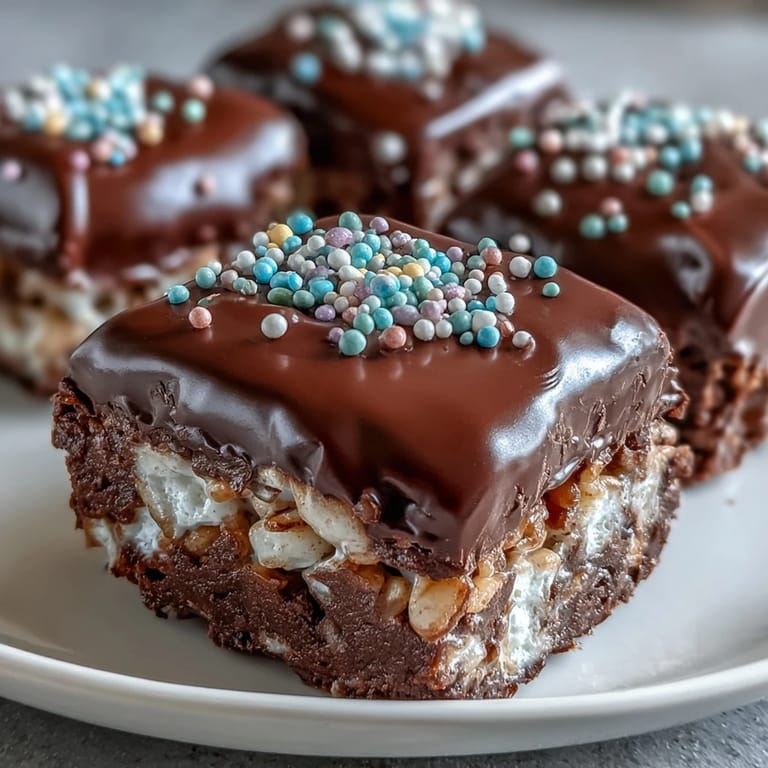
Save There's a moment right after you sprinkle the toppings when the pan looks like a work of art, and I always pause to admire it before the chocolate sets. My daughter once helped me make a batch for her school bake sale, and she took such care arranging the sprinkles in a pattern that I didn't have the heart to tell her they'd be cut apart. When we delivered them the next day, her teacher said they were the first thing to sell out. She beamed the whole way home, and I realized these treats aren't just about the taste—they're about the pride of making something beautiful together.
How to Store and Keep Them Fresh
I keep mine in an airtight container at room temperature, where they stay perfectly chewy for up to three days. If your kitchen runs warm or you live somewhere humid, the fridge is your friend—they'll last a week and the chocolate stays nice and snappy. Just let them come to room temperature for a few minutes before serving so the marshmallow layer softens back up. I've also frozen individual bars wrapped in plastic and foil, and they thaw beautifully in about 20 minutes when I need a quick treat.
Variations Worth Trying
White chocolate with pastel sprinkles turns these into perfect baby shower or Easter treats, and the lighter color really makes the toppings pop. I've stirred in a tablespoon of peanut butter with the marshmallows for a nutty twist, and drizzled melted peanut butter chips over the chocolate for extra decadence. Around the holidays, I swap the sprinkles for crushed peppermint candy or mini M&Ms, and suddenly they feel festive. You can even use flavored marshmallows—strawberry or vanilla—to add a subtle layer of flavor without any extra work.
Serving Suggestions and Presentation Ideas
I like to stack these on a tiered stand at parties, where they look almost too good to touch. For a kids' birthday, I cut them into smaller squares and wrap each one in colorful cellophane tied with ribbon—instant party favors. They pair beautifully with vanilla ice cream for a quick dessert, or you can crumble one over the top of a milkshake for added crunch. If you're feeling fancy, drizzle a contrasting chocolate (white over dark, or vice versa) in thin lines across the top before the base layer sets.
- Serve them on parchment squares to keep fingers clean and presentation tidy.
- Pack them in a clear box or tin for gifting, layered with wax paper between each row.
- Pair with cold milk, hot coffee, or even a scoop of gelato for a simple but satisfying dessert.
 Save
Save These treats remind me that you don't need fancy techniques or rare ingredients to make something people remember. Every time I pull a tray out and see those glossy, sprinkle-topped squares, I feel like a kid again—except now I get to share that joy with everyone around me.
Recipe Questions & Answers
- → Can I use regular marshmallows instead of mini marshmallows?
Yes, you can substitute regular marshmallows for mini ones. Use about 4 cups of regular marshmallows, which equals one 10-ounce package. They may take slightly longer to melt completely.
- → How do I prevent the mixture from sticking to my hands?
Lightly butter your hands or the spatula before pressing the mixture into the pan. You can also use a piece of parchment paper or wax paper to press down evenly without sticking.
- → What type of chocolate works best for the topping?
Semisweet or dark chocolate chips work perfectly and provide a nice balance to the sweet marshmallow base. You can also use milk chocolate for a sweeter finish or white chocolate for a different flavor profile.
- → Why add oil to the melted chocolate?
Adding a small amount of vegetable or coconut oil helps thin the chocolate slightly, making it easier to spread smoothly over the bars and giving it a beautiful glossy finish when set.
- → Can I make these ahead of time?
Absolutely! These treats store well in an airtight container at room temperature for up to 3 days or refrigerated for up to a week, making them perfect for advance party preparation.
- → How do I get clean cuts when slicing the bars?
Use a sharp knife and wipe it clean between cuts. For even cleaner edges, warm the knife under hot water, dry it quickly, then slice. The warmth helps the knife glide through the chocolate without cracking.