 Save
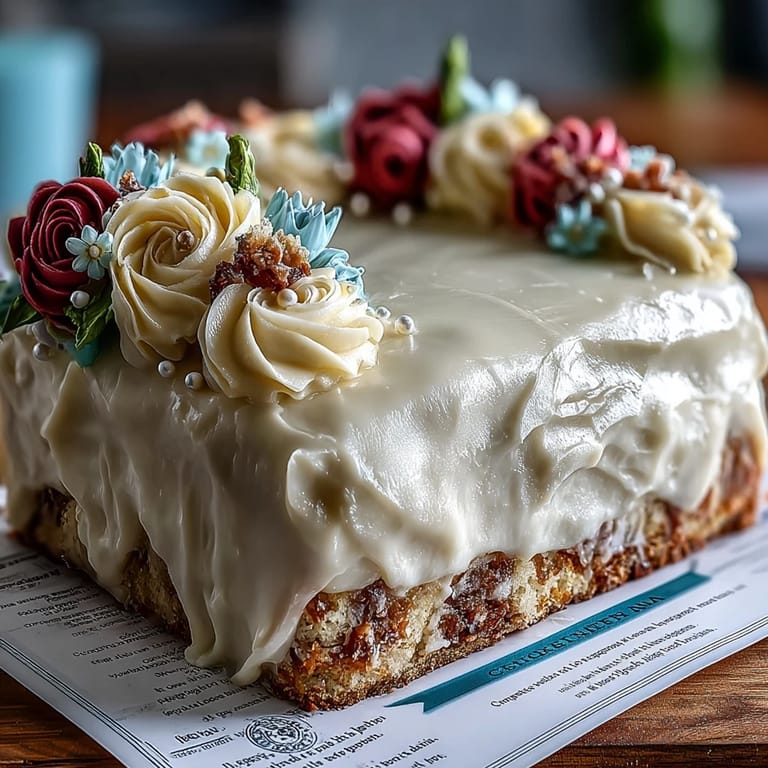
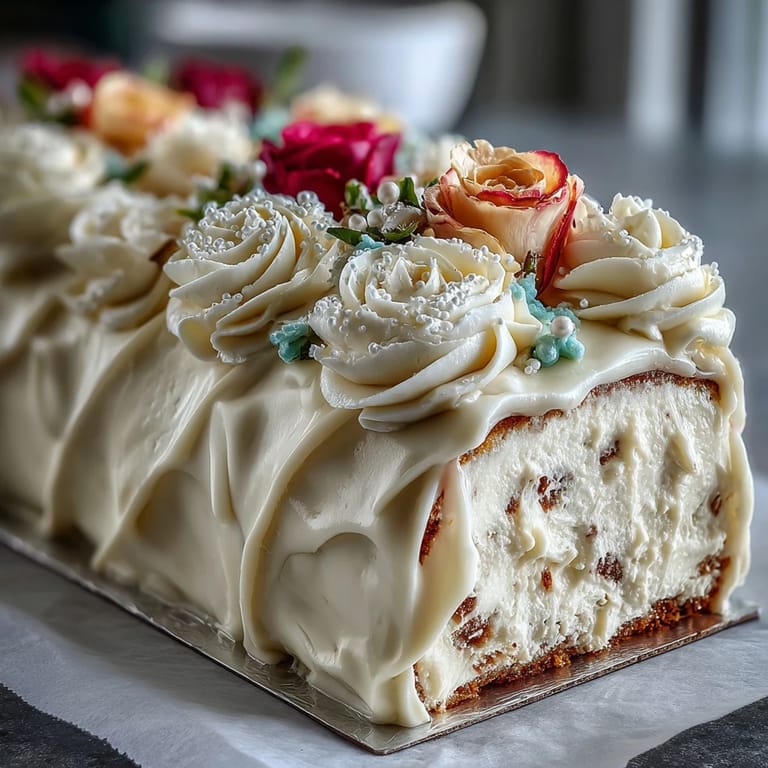
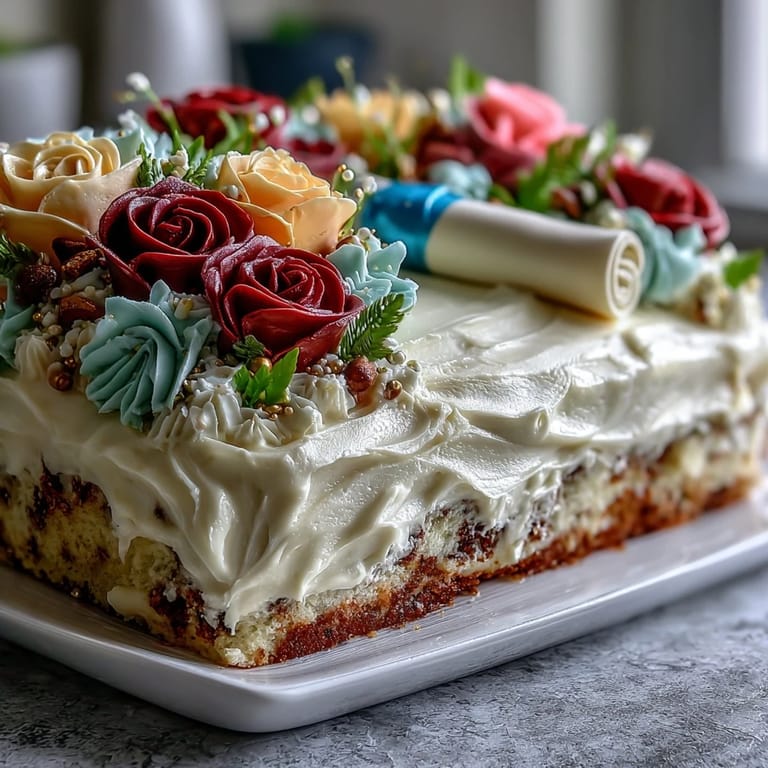
Save The first time I made this graduation sheet cake, the kitchen was alive with anticipation—the kind you can feel in the air as a big event draws near. The fragrance of vanilla and butter mingled with laughter as I practiced my frosting skills, secretly hoping my roses would turn out more garden than wild. I remember my hands shaking just a little as I piped the first buttercream flower, knowing this cake was destined for a joyful celebration. It wasn't until I arranged the edible diploma on top, a nod to hard-earned achievements, that the cake felt complete. Now, I look forward to each new occasion as a chance to try another color palette and improve my technique, all while savoring the moments that come with it.
When I created this cake for my cousin's high school graduation, I nearly forgot the fondant diploma until she reminded me with a grin. We ended up laughing as I shaped it—her steady hand tying the ribbon while mine brushed on gold pearls. That afternoon, as the cake took center stage, it felt more like a shared accomplishment than just dessert. The kitchen was abuzz with friendly teasing about frosting colors and how many roses we could fit, making the entire process even sweeter. It's these little mishaps and bursts of creativity that turn baking into a team effort.
Ingredients
- All-purpose flour: Sifting it first ensures a lighter crumb and prevents lumps—I learned this after a few dense cakes.
- Granulated sugar: Creaming it well with butter helps create pillowy softness in every slice.
- Unsalted butter: Softening the butter ahead gives the batter a velvety texture—don't rush this step.
- Whole milk: Room temperature milk blends smoothly, avoiding unwanted curdling.
- Large eggs: Bring them to room temperature for a fluffier rise—a trick from a baking neighbor.
- Vanilla extract: The aroma always signals celebration; use pure vanilla for depth.
- Baking powder: Careful measuring prevents uneven rising, so I now double-check each scoop.
- Salt: A pinch sharpens flavors and balances the sweetness.
- Powdered sugar: Sifting makes buttercream cloud-like and avoids gritty bites.
- Food coloring (gel preferred): Gel colors give vibrant hues without watering down the frosting.
- Edible pearls, fondant, or white chocolate: These decorations are optional but make the cake extra festive—school colors are always a hit.
Tired of Takeout? 🥡
Get 10 meals you can make faster than delivery arrives. Seriously.
One email. No spam. Unsubscribe anytime.
Instructions
- Prep the Pan and Oven:
- Set your oven to 350°F and line the pan with parchment. It feels satisfying to run your hand across a perfectly smooth layer—the start of something special.
- Cream Butter and Sugar:
- Beat the butter and sugar by mixer until the mixture looks pale and fluffy, as soft as a cloud. Pause to scrape the bowl so every grain blends evenly.
- Add Eggs and Vanilla:
- Mix in eggs one at a time and stir in vanilla; the batter should smell irresistible, even before baking. If the mixture looks a little curdled, just keep going—it'll smooth out.
- Whisk Dry Ingredients:
- Sift the flour, baking powder, and salt, whisking gently so nothing escapes into the air. I always tap the bowl to ensure no rogue lumps survive.
- Combine Wet and Dry:
- Alternate flour and milk additions, starting and finishing with flour. Stir on low—the batter will be thick but silky, ready for the pan.
- Bake the Cake:
- Spread the batter evenly in the pan, smoothing the top with an offset spatula. Bake until golden and a toothpick comes out clean, usually about 29 minutes.
- Cool Completely:
- Let the cake rest for 10 minutes in the pan, then flip onto a wire rack. The cake is delicate now—patience pays off for perfect slices.
- Make Buttercream:
- Beat butter until creamy, then slowly add powdered sugar, vanilla, and milk. The frosting should be fluffy and spreadable, tasting like sweet silk.
- Color the Buttercream:
- Divide frosting into bowls, tinting with gel colors for roses, leaves, and diploma accents. Tip: Always start with just a dab of color—you can deepen as you go.
- Frost the Cake:
- Layer the cooled cake with smooth buttercream, spreading carefully to avoid crumbs. It's like washing a canvas before painting flowers.
- Pipe Roses and Leaves:
- Use piping bags and tips to pipe roses and leaves—it's okay if your first few are wild, just keep going. Their vibrant colors brighten the whole sheet.
- Create the Diploma:
- Shape fondant or white chocolate into a scroll, tying with colored fondant for the ribbon. Place on the cake for a playful graduation centerpiece.
- Add Accents:
- Drop in edible pearls and other decorations. This final touch makes the cake ready for celebration.
 Save
Save The cake became more than dessert when my family gathered around, sharing slices and stories of late study nights. That edible diploma prompted laughter and hugs, transforming a simple sheet cake into a centerpiece for new beginnings.
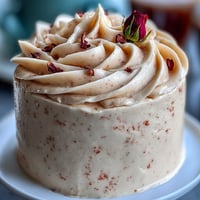
Decorating Tricks for Buttercream Roses
The first roses I piped looked lopsided but tasted sweet nonetheless. Swirling the tip steadily and starting with a tight center helps create more realistic blooms. If a rose unfurls too quickly, I simply smooth it with a spatula and try again—each flower is unique, much like the graduates we're celebrating.
Personalizing With School Colors and Diploma Details
Mixing gel food coloring can be a spirited affair—especially when matching school colors for team pride. A little gold or silver pearl goes a long way in making your diploma stand out, and ribbon-tied scrolls add whimsy. Swapping out decorations for team mascots or initials turns the cake into a personal congratulatory gesture.
Making Ahead and Storing For The Big Day
Baking the cake a day in advance frees up decorating time for the celebration. I wrap the cool cake tightly and refrigerate; buttercream can stay fresh covered for a couple days. Assemble decorations right before serving to keep everything crisp.
- If you're worried about the roses wilting, chill the cake until just before display.
- Keep the edible diploma dry so it won't melt into the buttercream.
- Remember, a little extra frosting fixes many small cracks and imperfections.
 Save
Save Everything about this sheet cake feels like a celebration, from piping the last rose to sharing laughter over the edible diploma. I hope your graduates enjoy every bite as much as mine did.
Recipe Questions & Answers
- → How do I achieve vibrant rose colors?
Use gel food coloring mixed into divided buttercream for bright, non-watery hues.
- → Can this cake be made chocolate flavored?
Replace ¾ cup flour with unsweetened cocoa powder for a rich chocolate variation.
- → How should I decorate for school personalization?
Pipe roses and leaves in school colors and use fondant ribbons matching the graduate’s theme.
- → What tools are needed for rose piping?
Piping bags with rose and leaf tips, plus an offset spatula for frosting, make decoration easier.
- → Is the cake suitable for vegetarians?
Yes, it uses eggs and dairy but contains no meat or fish products.
- → How many servings does this sheet cake provide?
The cake generously serves 24, perfect for gatherings and celebrations.
- → What allergens should I consider?
Wheat, eggs, and dairy are present. Check decorations and coloring for additional allergens.